Shooting the dialogue sequence
When we shot our dialogue sequences, we assumed there would be a lot that would go wrong due to our little experience with the equipment, however I think our mini sequence was quite successful. We were given a quick briefing on what we had to do in the lesson and were also introduced to the microphone that would pick up the dialogue.
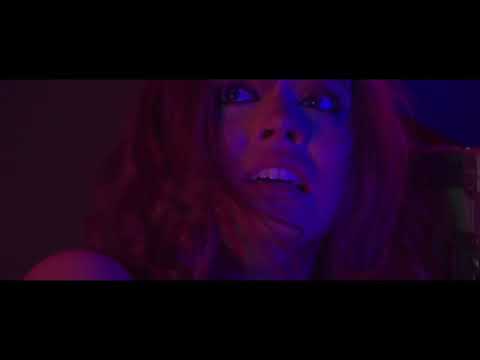
Then we got into a small group and went into a classroom with the equipment. I was lucky that I had my opening sequence group within the group that day so we could get used to working as a team. Danny and I began as the two actors in the scene and Sophie then joined later holding the mic and then acting. We made a simple sketch where I walked in, sat down, shared some dialogue with Danny and then Danny walked out and Sophie came in. Sienna was on the camera and we swapped in when we weren’t acting. We got all the footage we could and in a later lesson we had the editing workshop.

During the process, I remembered a bunch of the rules from previous workshops which I then utilised during this exercise. We made sure to be super careful with the equipment, remembering the ‘yours and mine’ rule. We also all contributed when using the camera on the tripod, that the tripod was evenly put up or down so the camera didn’t fall off.
On that day, we learnt that the microphone plugs into the back of the camera into one of the sockets and has a wind shield for outdoor filming but we used it anyway. Sienna remembered to bubble the camera so that it was level and we were told some tips when filming dialogue. For example, being at the same level as the people talking for a more professional looking shot, as well as multiple takes of the conversation from multiple varied angles whilst keeping the camera rolling. This is so when it comes to editing you have lots of options and a choice as to who gets more screen time and who doesn’t. We recalled the 180-degree rule and stayed within it so our shots made sense. Remembering all these skills taught from previous lessons helped hugely with the filming of these sequences and I’m sure has made us more familiar when using the cameras, getting intact with our mind-muscle-memory.

Editing our Dialogue Sequence:
We got into the editing sweet a few days later and we found our sequences on the computers and were told to work in twos. I worked with Sienna as we shared the role of ‘editor’ for the lesson. I had previously missed an editing lesson which I was worried would be a setback, however, with some recaps and quick tutorials from Sienna, I quickly got the hang of it. We found our files with all the footage took previously and dragged out the best clips for our short scene we were about to create. We were then taught that the sound from each clip could overlap and sound tacky so we used a tool in the app that helped smooth out the transition.

The experience of editing our short dialogue sequences opened up my knowledge to the process from filming to editing and how you can use each shot to your advantage. I learnt a few tricks when editing. Like using the key ‘I’ to select what part of the shot you want to drag into the cutting area. Your then use a ‘razor tool’ to cut your scene. We also learnt that the amount of screen time you give each character translates into how important they are or who the scene is about.
A few mistakes were made including; not cutting a clip short enough which resulted in a delayed sound from the previous shot, and our camera angle meant we had too much head room, however, that could be fixed with cropping the image. The lighting was a little too dark even though we did the best we could in the room. We followed the 180-degree rule which helped the editing process as it was clear where each actor was in comparison to the shot.
I think we did well for our first dialogue sequence, although, if I were to do it differently I would have made the microphone closer to the actors as some of the words got lost in the room.

When editing our actual sequences, I would make sure we have gathered as much footage as possible so we have a lot of options of where to cut and where not to in the editing room. We will make sure the lighting (white balance, exposure) it perfect so we don’t have a problem where you can’t see our characters. We may vary between longer shots and quick cuts and even editing it so that when the main action is happening, like the man being beaten to death with the hammer, it’s on the girl’s reaction with the sound in the back. A shot like this will hopefully make our sequence look more professional and less tacky.
Here is our dialogue sequence we edited in a lesson:
No comments:
Post a Comment